Teléfono : 0086-592-5097292
Whatsapp : +8618059296519
Correo electrónico : sales@ecowaysteel.com


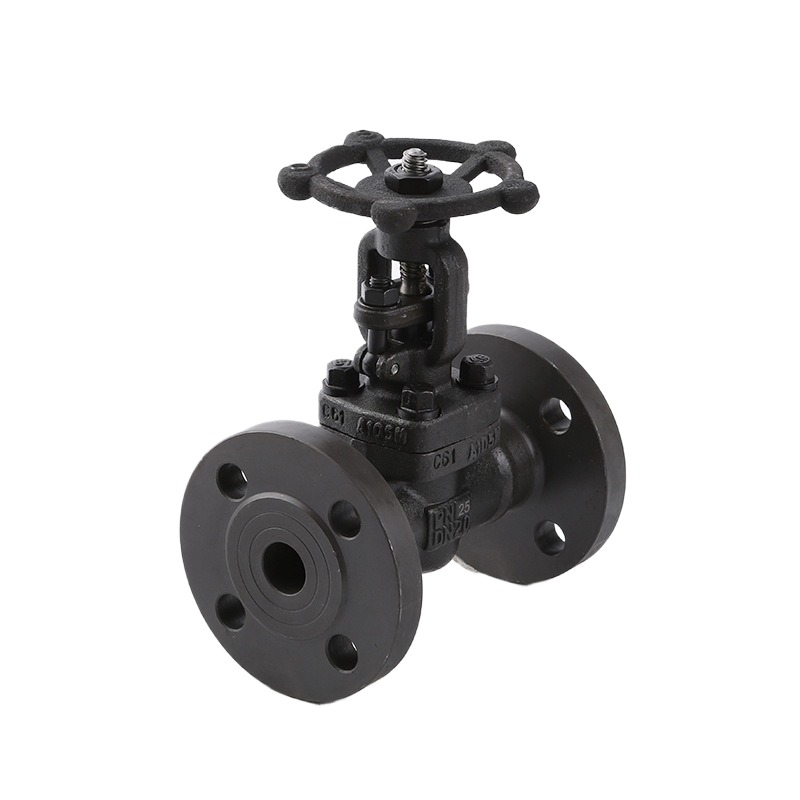
Las válvulas de globo son componentes de tuberías comunes en una amplia gama de entornos industriales. Su diseño probado en el tiempo los hace muy adecuados para estrangular y controlar el flujo de encendido y apagado frecuente. Pero todas las válvulas eventualmente requieren mantenimiento o reparación. Repasemos el proceso completo de las mejores prácticas de instalación de nuevas válvulas de globo, desmontaje, solución de problemas comunes y reconstrucción de válvulas de globo para dejarlas como nuevas.
Lo que aprenderás
Una vez que cubrimos el proceso de servicio completo, tendrá el conocimiento para mantener sus válvulas de globo en óptimas condiciones operativas durante décadas de control de flujo confiable.
Antes de abordar los problemas y buscar un kit de reparación de válvulas de globo, repasemos brevemente cómo se construyen y controlan el flujo las válvulas de globo. Esto hará que los pasos posteriores de solución de problemas y reemplazo de componentes sean mucho más fáciles de comprender.
Las válvulas de globo tienen tres secciones principales:
Luego, muchos componentes de internos intercambiables alinean la dirección del flujo de la válvula de globo, incluidos asientos, guías y discos/tapones diseñados para aplicaciones específicas.
Para abrir y cerrar, el volante gira el vástago para subir y bajar el disco/tapón lejos del asiento. Esto permite o restringe el flujo a través del cuerpo de la válvula. Las válvulas de globo no se cierran completamente hasta que el disco duro se asienta contra el anillo de asiento del cuerpo.
Una vez que elija la válvula de globo y los internos óptimos para una aplicación, luego vienen importantes consideraciones sobre la instalación de la válvula de globo. La clave es configurar la válvula para permitir el movimiento adecuado del disco y evitar daños al fluido.
A pesar de las mejores prácticas de instalación de válvulas de globo, las válvulas de globo eventualmente desarrollan problemas debido al desgaste, la contaminación o los daños por corrosión. Estos son los problemas más frecuentes:
Las fugas provenientes de las juntas del capó o de la caja de empaque durante la operación indican sellos desgastados. Apriete moderadamente las tuercas del prensaestopas, pero aflojarlas o apretarlas repetidamente acelera el desgaste de la empaquetadura. Es posible que sea necesario un reemplazo importante del empaque.
También revise las juntas del cuerpo-bonete si aparecen fugas entre las dos mitades de la carcasa. Los pernos de brida flojos también pueden causar fugas con el tiempo.
El líquido que sale por la salida de la válvula cuando está completamente cerrada indica daño interno. Es probable que el disco no esté completamente sellado en el asiento, lo que permite que el líquido se cuele por las superficies de sellado. Este es un problema importante que requiere desmontaje para acceder a las piezas internas.
Los problemas adicionales incluyen rigidez en el giro del volante debido a la acumulación de sarro/suciedad, flujo ruidoso y emisiones del capó. Con el tiempo, también se producen vástagos atascados y cierres bruscos a medida que los lubricantes reductores de la fricción se pierden del empaque.
Cualquiera de estos cambios operativos indica la necesidad de inspección y reconstrucción. Detectar los problemas a tiempo minimiza el desgaste general.
Una vez que haya diagnosticado un problema, es hora de desmontar la válvula de globo para acceder al interior. Esto requiere una organización meticulosa de los componentes retirados. Siga estas pautas paso a paso:
Examine minuciosamente cada pieza extraída durante el desmontaje para detectar:
Una vez que se hayan reemplazado todos los componentes desgastados, es hora de volver a ensamblar con cuidado la válvula de globo en orden inverso:
Dé servicio a las válvulas de globo aislando, despresurizando, desmontando, limpiando, inspeccionando, reemplazando piezas desgastadas como asientos y empaquetaduras, y luego volviendo a ensamblarlas con cuidado.
Instale las válvulas de globo horizontalmente con el volante en posición vertical para lograr un movimiento y sellado óptimos del disco. El montaje vertical puede impedir el cierre total.
Libere las válvulas de globo atascadas inyectando aceite penetrante alrededor de la empaquetadura y el vástago, golpeando el capó y el volante con un mazo y moviendo lentamente el volante hacia adelante y hacia atrás. Es posible que sea necesario desmontar los vástagos muy atascados.
Las válvulas de globo se encuentran en todas partes, desde plantas químicas hasta sistemas HVAC, debido a su rendimiento comprobado en la dirección del flujo de las válvulas de globo. Pero sus piezas móviles eventualmente requieren servicio para mantener un cierre hermético y un funcionamiento sin problemas. Aprender los pasos para instalar, solucionar problemas, desarmar, reparar y reconstruir válvulas de globo le reportará beneficios durante años de servicio confiable.


ROOM 1901-6 Haiguang Bldg. No. 33, Shuixian Rd., Siming, Xiamen China 361001
 Soporta red IPv6